Showing posts with label sewing. Show all posts

2.20.2015

The Remodel of My Childhood Doll House

When I was expecting my first daughter, I began remodelling my childhood doll house!


It was quite late 80's/early 90's in style. Here are some before photos...


I decided to leave the exterior alone, but I painted the inside walls & trim and redid the fireplace...


I painted the table and painted a design on the wall with a stencil...


I painted and added new fabric onto the furniture & sewed little cushions.
I painted mini canvases and added photos of both my daughters at the same age to look like artwork.


I still have yet to re-do the couch in the living room. 
I made the curtains and curtain rod. I made the little white table and the books. The books were made with paper and mod podge. The are stiff and likely can't be destroyed by my kids.
I got the pink mini chalkboard in the dollar section at Michael's. I made the little rug when I was little at a church activity I believe.
In the frame above the couch I added a photo of my 3 kids.


Upstairs I made some bedding for the bed and made the little nightstand and painted the lamp.
I went through my scrapbook stash and added some items onto the wall for decorations.
I sewed more little cushions. My MIL made the little pink rug. The doily-type rugs are doilies I picked up in the dollar section at Michael's.


I really enjoyed decorating up my old doll house for my girls to have! My older daughter is turning 5 in the spring and really wants a big plastic Barbie Dream House and I am all for getting her one cause I think it would be cool for Barbie to have neighbors. lol She is quite obsessed with Barbies- like mother, like daughter!

Anyone else pass on their childhood doll house to their daughter(s)??


11.07.2012

DIY Christmas Pillow

Hope you're enjoying your Wednesday! We are getting SO MUCH snow here today it is insane!

I made a few projects last Christmas that I never got around to posting about.


The first is this pillow makeover:


I had this pillow that wasn't really my style, stored in the basement......


I made a new case for it using this cute Christmas fabric my SIL had given me for Christmas the year before. 
When I was finished sewing the cover, I made 5 rolled fabric flowers using some of the scraps. I like how the flowers jazzed it up a bit.


I am getting really excited for Christmas time and I look forward to decking the halls around here!

When do YOU decorate for Christmas???


8.30.2011

new cushions- made with useless fabric

I keep on meaning to mention that I recently bit the bullet and joined Twitter. Here's the link to my tweets:


..........................................................................


This is my 3rd project in a row for the master bedroom! I made some covers for the cushions on my bed:


I used the extra fabric after hemming the linen Ikea curtains in the room. And I also used the tie-backs!

For the first one, I made the cushion cover, then added on the tie-back by making the ruffled band on the lower half. I was pretty pleased with how it turned out!


I wanted the second one to coordinate without being too matchy! So I used the 2nd piece of tie-back fabric to sew the band onto the upper part. Then I used some scrap fabric to make a rosette, then I added it on using my glue gun. (These are more decorative and hopefully won't need to be washed as often.) I also love how this one turned out!


They both took so little time to make & it felt good to make pretty things using that leftover fabric that I would have otherwise thrown away! :)

{This project was featured at Sweet Tea Serendipity & Sassy Sites.}

7.14.2011

some new hand-sewn flowers

I made up these easy flowers...


If you have been following my blog for a while, you may remember when I first shared the tutorial, if not click HERE.


They are easy to make.

They are a great way to use up some fabric scraps.

They are perfect to add onto a clip or headband.
Or anything else you can think of!!


7.07.2011

diaper strap

So I finally have a couple of minutes to post my little sewing project from the other day!

I like having things organized- and my diaper bag is no exception. I have had a diaper holder to store diapers in. But lately I have wanted a change... something simpler. So I made this diaper strap:


It is large enough that it fits my wipes case and a couple of diapers....


..... like this:


Or if we are travelling, it can hold more diapers and the wipes case can be on its own. It has velcro to easily close and keep everything together!


I love it!! :)


Places to Party: Chicy Creations, C.R.A.F.T., Crystal's Craft Spot, Homemaker in Heels, Homemaker on a Dime, It's FUN to Craft, Keeping it Simple, Lolly Jane Boutique, Making the World Cuter, My Junk Drawer, Naptime Crafters,Sassy Sites!, Simply Designing, Somewhat Simple, Sumo's Sweet Stuff, Tatertots and Jello, The Girl Creative, Tip Junkie, Today's Creative Blog, Trendy Treehouse, Yesterday on Tuesday, Young and Crafty

5.31.2011

apron made from pants

Last year I had been inspired by this tutorial from Keeping It Simple on making an apron from a pair of pants. So recently, I finally decided to just do it!


I used part of this pair of pants.......


.....to create this apron!


Instead of using fabric around the edges, I decided to use ribbon. It made it a bit easier for me because I have a love/ hate relationship with sewing lately. {It's just hard to find the time to get all set up. I can't wait to have a spot to leave my sewing machine set up... someday!}


I liked the extra buttons and other details on the pants and like how they look on the apron!


Photobucket

3.02.2011

airplane apron

This apron is for my 3 year old son:


I bought this apron & chef hat set from Michael's a couple of months ago...


And I made this airplane out of fabric to sew on the front. I added felt for the windows.


He thought it was pretty cool!


Now he can dress us in it to help me in the kitchen, he's a very willing little helper. And dress up clothes are just fun period.


Total project cost: less than $2. It doesn't get much better than that!


1.26.2011

a holder for his cds.

The other night I whipped up this funky holder for my son to store his fave cds in...


I thought it would be perfect for him to bring on trips in the vehicle. It holds 4 cds which is just the right size for how many he would actually need to bring :)


I of course had to add on the "J" monogram to personalize it for my little man. He loves that I made this for him and he likes things orderly, just like his mama! {wink}


Stay tuned for some news about a giveaway!


1.11.2011

brown and pink wipes case

Just a new wipes case I made to add to a baby gift...


You gotta love the brown and pink together!


Have a good day:)


1.10.2011

pink and green tutu TUTORIAL

In case you missed it, I was invited to guest post at Crystal's Craft Spot last week where I shared a tutu tutorial. Here it is.......


Today I'm going to sh0w you how to make a pretty tutu for your little girl to dress up in!
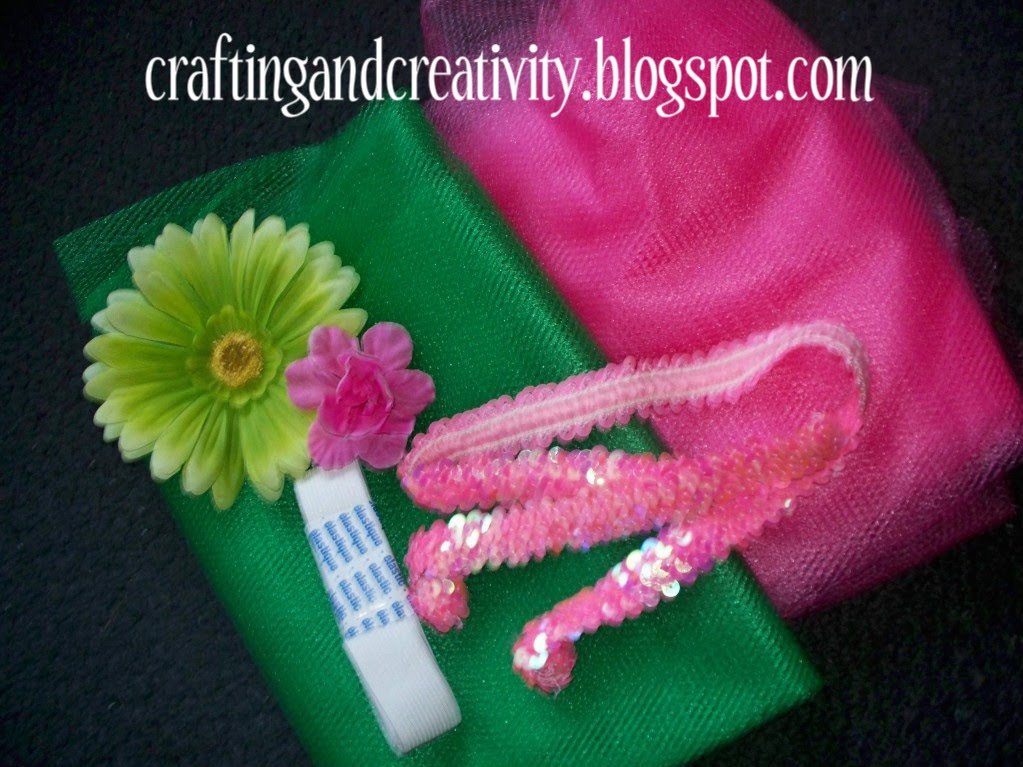
For supplies all you need is your tulle (I think I used about 3 meters in each color), elastic, and sequins and/or flowers to embellish it at the end if you desire. (BTW, I didn't end up using both the flowers pictured here, I just went with the green one.)


You will also need scissors, needle and thread, and a glue gun if you decide to add flowers at the end.
Cut your tulle into 2 inch strips that are twice as long as you would like the length of your tutu to be at the end. I ended up having about 70 pieces of tulle in each of my colors...


Measure the child's waist and subtract a couple of inches because we're using elastic for the waist. Sew the ends together.
Next, slip the elastic past your knee because that's an easy way to tie the tulle strips onto it. Fold each piece in half, then tie it on like so...


How much easier does it get?!! Keep on going now until your tutu is looks as full as you want it to look!


You can either leave it and you're done.............


Which is totally fine. It looks really pretty like this.


OR you can jazz it up a bit more! I made this one for my six year old niece to play dress-up with, so I wanted it to be more flashy! So I sewed the sequined piece of elastic around the top, using my needle and thread.


Then I added the large flower using my glue gun. Here's the finished product:


And in case you're a new reader of this blog, here are the ones I made in the past for my daughter........

I made this pink one so she could be a ballerina for Halloween:


And I made this fall-inspired one just for fun:


Happy crafting!!


LinkWithin

Related Posts with Thumbnails