Showing posts with label hair stuff. Show all posts

2.17.2012

some DIY flower hair clips


Hey! There hasn't been any crafting or sleeping for me this week- my daughter is sick.

But I made some hair stuff a while back that I will share today!


I made up a bunch of flower clips for my daughter.......... {see the TUTORIAL here!}


And back in December, my kids got their first cousin on my side! I was excited to make up some things for my new niece's hair...... {you can see a tutorial for the felt flowers here}


Monday is Family Day here in Canada, so I am excited for a long weekend!!



 Places to Party: C.R.A.F.T., Fingerprints on the Fridge, Ginger Snap Crafts, Homemaker in Heels, Homemaker on a Dime, Keeping it Simple, Lolly Jane Boutique, Laugh, Love, and Craft, Lil' Luna, Making the World Cuter,  Naptime Crafters, Pocket Full of Pink, Sassy Sites!, Seven Thirty Three, Sew Chatty, Simply Designing, Skip to my Lou, Someday Crafts, Somewhat Simple, Sugar Bee Crafts, Sumo's Sweet Stuff, Tatertots and Jello, The Girl Creative, Thrifty Decorating, Tip Junkie, Today's Creative Blog, Trendy Treehouse, Yesterday on Tuesday, Young and Crafty

12.09.2011

hair clip for Christmas

Hey everyone, just wanted to quickly share a cute little clip I made for my daughter to wear in her hair this season....


I found some Jolee's Boutique glittery flowers on clearance at Michael's. 

So all I had to do was cover the alligator clip in ribbon, add on a foam grip, and then the flower!

I actually made this one day last week when I was up in the night with her at 3 am after she had a coughing fit in the night.

Isn't it super-cute on this pretty little girl of mine?!


I also had her wearing this headband I made her last Christmas....


9.13.2011

minnie mouse hair clip

The countdown is on for our family's trip to Disneyland! After seeing some cute Minnie Mouse hair stuff at Sugar Bee Crafts and on Wray Sist3rs via Pinterest, I knew I needed to make a Minnie Mouse something for my daughter's hair. This is what I came up with:


And here is how I made it.....

I cut 3 circles out of some black felt. {One large and two small circles.}


I had some scrap pieces of black linen fabric. I cut some of the strips in half, then used my glue gun to make the twisted rosettes.


Here's what they looked like at that point...


Then I glued them together. Added a piece of felt on the back to make them a bit sturdier, then added a bobby pin using my glue gun. The last step was adding on a piece of ribbon that I made to look like a bow. I opted for pink instead of red because most of my daughter's wardrobe has pink on it :)


The first time I put it in her hair, it stayed in for about 2 seconds, just long enough for her to reach her arm up and pull it out. The second time, I put it in while my kids were playing outside and she didn't even try taking it out. But she would not hold still for a second to let me take a nice picture... no surprise there.


I think she looks pretty darn cute with her new little hair accessory!

{This was featured at One Pretty Thing.}

Places to Party: C.R.A.F.T., Ginger Snap Crafts, Homemaker in Heels, Homemaker on a Dime, It's FUN to Craft, Keeping it Simple, Lolly Jane Boutique, Laugh, Love, and Craft, Lil' Luna, Making the World Cuter, My Junk Drawer, Naptime Crafters, Rustic Crafts, Sassy Sites!, Seven Thirty Three, Sew Chatty, Sew Woodsy, Simply Designing, Skip to my Lou, Someday Crafts, Somewhat Simple, Sugar Bee Crafts, Sumo's Sweet Stuff, Tatertots and Jello, The Girl Creative, Thrifty Decorating, Tip Junkie, Today's Creative Blog, Trendy Treehouse, Yesterday on Tuesday, Young and Crafty

7.22.2011

t-shirt pom pom flower

Things just haven't gone well for me on the picture-taking front this week. My camera died on Sunday. I bought a new one on Monday. Then as I tried uploaded photos for this post earlier, blogger told me I had reached my photo storage limit with Picasa Web Albums. Ugggg! Although I have free space on my account again, it doesn't instantly register that I have room again. Anyways, thankfully I have my Photobucket account to host these pictures in the meantime. Just had to share my headache....

So thanks to Pinterest I have a crazy, long to-do list for crafts and just about everything! I came across this tutorial to make flowers out of t-shirt material and knew I had to try it out.

Earlier this week I had started a freezer-paper stencil shirt for my daughter that didn't turn out. I can be quite impatient when it comes to painting. Because I had used too much fabric paint during a coat and had taken the stencil off before it was all finished drying, it didn't turn out very pretty.

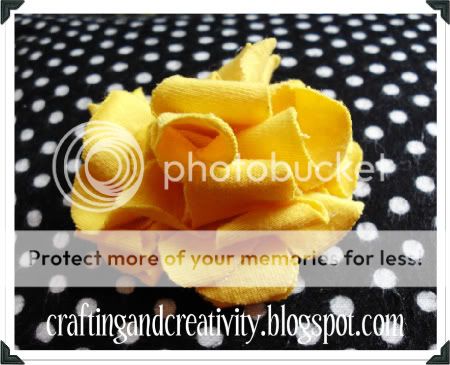
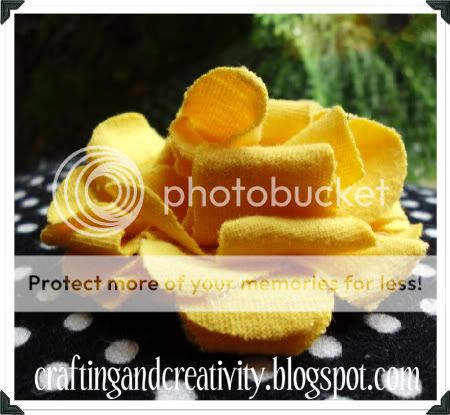
So I was able to use some of the material for the shirt for this project. I think the yellow flower turned out pretty...


These are really easy to make & can be added to just about anything!


I also made another little flower clip for my daughter's hair...


She was so not in the mood to pose for me, so this picture of her looking outside at the rain works.


I am kinda on a flower-making kick right now as you can see! ;)


And by the way, I will be hosting a giveaway here on my blog next week for those who follow me on Facebook.... hand-made headbands are gonna be given away! Just a head's up for everyone :)


Places to Party: Chicy Creations, C.R.A.F.T., Crystal's Craft Spot, Homemaker in Heels, Homemaker on a Dime, It's FUN to Craft, Keeping it Simple, Lolly Jane Boutique, Making the World Cuter, My Junk Drawer, Naptime Crafters,Sassy Sites!, Simply Designing, Somewhat Simple, Sumo's Sweet Stuff, Tatertots and Jello, The Girl Creative, Tip Junkie, Today's Creative Blog, Trendy Treehouse, Yesterday on Tuesday, Young and Crafty

3.17.2011

large daisy headband

And here's the headband that started my headband obsession for the week! A friend of mine asked if I could make a white headband for her 2 year old little girl to wear to a wedding this weekend. So I made one like this for her.... then made another one for my little girl to wear!


Her little girl was so funny as she wore her new headband. You could tell she felt very pretty!

I think I may have to make some more. Making these has me thinking that spring may come soon. Even though it is snowing here today.... :(


Photobucket

pink rosette headband

Here's another cute headband I made this week. Once I start making headbands, I find it hard to stop! :)


Photobucket

3.16.2011

green and white polka dot headband

Hey everyone! I have a few things to share, but no time to blog lately. For now I'll show you this fun headband I made with white fabric that has green polka dots on it. Maybe I can wear it tomorrow for St. Patty's Day and avoid getting pinched! {wink}


I think it's pretty cute!
Check back soon for some more headbands and a fabulous GIVEAWAY! :)


Photobucket

11.27.2010

it's all about the accessories!


Today I have a couple new headbands that I made for my daughter...

I made this one to go with her Christmas dress. I made a similar one that you can see here.


{The flower came from Walmart and the jewel came from Michael's.}


Here's my baby girl modeling it...


I made this other one early Sunday morning before church. It took about 5 minutes to put together with my glue gun. She needed something to go with another new dress of hers. I had some wide ribbon on hand that I made into a bow. Then I glued it onto some ribbon and added a piece of elastic to the back of it, too. This is as easy as it gets!


I couldn't get a good one of her looking at me, but this gives you a better idea of what it looks like anyways!


11.01.2010

lace flower

I was inspired by the lace flower at Chicy Creations. So I'll show you my version.........


Although I LOVE the pink lace that Amy used, I only had white on hand. Here are the supplies I used:


I cut a circle out of white felt...


Then began gluing the lace down, working from the edges into the middle......


Using lace make it easy to burn your fingers on the glue. Don't ask how I know this ;)


I opted to kind of bunch the lace every so often, like this:


Then I glued this pearl in the centre:


I originally wanted to turn it into a headband for my daughter, like this:


The headband was cute, but just a bit too much lace for what I wanted. So instead, I stitched it onto this black shirt I bought for her last week. I can just remove it easily if I want to use the skirt plain.


She wore this to the wedding we went to on the weekend and got lots of compliments. But that's a regular thing for her :)


What would YOU add a lace flower to???


10.12.2010

ric rac rosette headband TUTORIAL


Today I'm going to show you how to make one of these adorable headbands. They are cute, they only require a few supplies, and you can make one in only minutes!!
The only supplies you will need are: your ric rac ribbon (I got mine at Michael's), glue gun, scissors, and some elastic for the headband itself.


All you do is roll your ribbon, and glue it every so often as you roll it. When it's the size you want, cut it from your ribbon spool.


And voila!!


You have a cute little rosette!


I glued 3 together onto a thin piece of ribbon that I has measured to fit my baby's head.


Here's my daughter in her newest headband:


LinkWithin

Related Posts with Thumbnails